Integral Lighting

Retaining Wall Lighting
Looking for a simple efficient way to light up a retaining wall, stair tread, or masonry column? Integral Retaining Wall Lights could be the answer for you. These wall lights were introduced to the hardscape scene in 2006. Over the years various LED models have become extremely popular for easy installation. Extremely versatile, they can be placed under caps, outdoor kitchen areas, and even on deck stair treads. This article demonstrates the procedure of installing lighting on a medium-sized outdoor sitting wall.
IL6 Xenon Light
Installation Overview
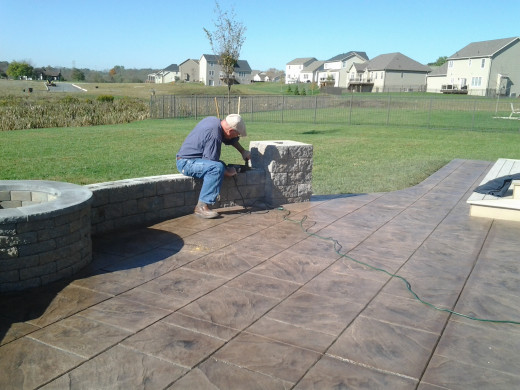
Installing low voltage hardscape lighting is easy. Whether your patio, wall, or walkway is already in place, or not, determines how to approach an installation. That said, following the steps of an actual project simplifies the process. Using an Integral Lighting Kit and a few extra fixtures, my father and I installed the following hardscape lighting project. Learning from samples and complying with their instructions, we installed lights on the sitting wall of a typical EP Henry Bristol Stone paver patio with an adjacent fire pit.
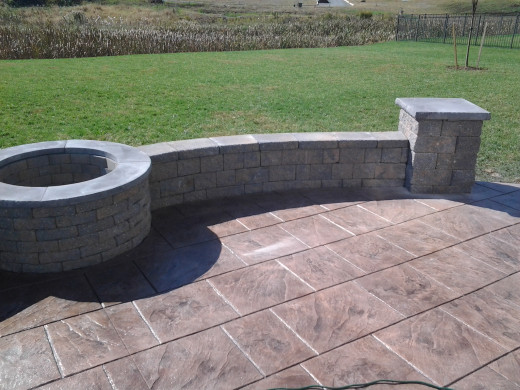
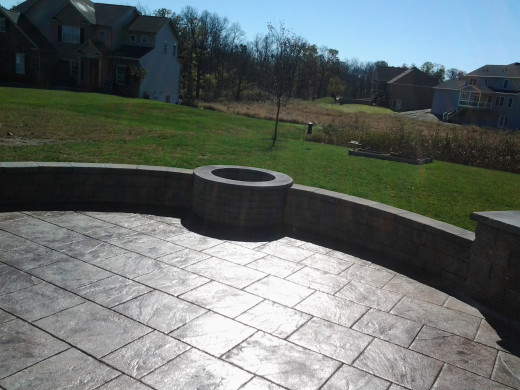
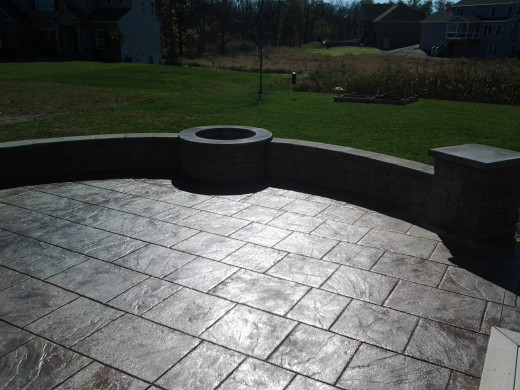
Day & Night

Before You Install, Wire Your Wall.
The above pictures illustrate the dramatic effect lighting can create. Please consider the lighting if you are planning on making alterations to an established structure or installing a new patio. If the latter, pre-wiring your wall with 12-2 gauge electrical wire will significantly lower cost. Whether you want to have lights in the near or distant future, remember to allow yourself options by wiring your wall now.
Wall Light Demo Video
Tools and Supplies Required
Tools and supplies required for installation include the Integral Lighting Kit, of course. However, you do need a few additional supplies. Several items, not mentioned in the installation guide(s), will make the job more convenient.
Beforehand, assemble a sharpened shovel for digging trenches and access channels for the direct burial wires, a voltmeter to measure the output of the transformer through the wire, a pad/tablet with pencil/stylus pen for drawing your layout, electrical tape to secure the wires (specifically, to wrap connector or wire pigtails so they don't accidentally get pulled apart), a laundry basket to carry and organize your supplies, and at least two contractor bags for trash. There will be extra strips of wire to discard. It's better to clean up as you go. Also, don't forget a pair of rubber tipped gloves for a better grip.
What's more, having a friend or relative help out makes the work go a lot faster!
Tools
Lighting Supplies
| Tools
| Misc. Items
|
|---|---|---|
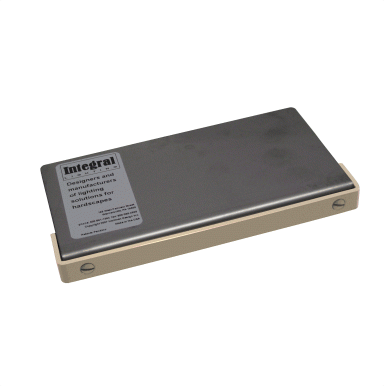
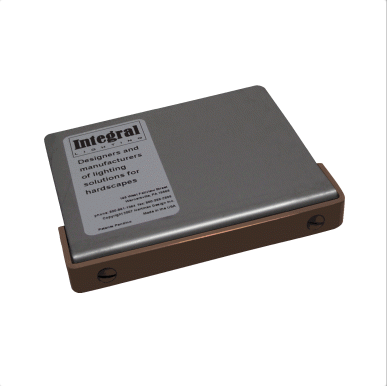
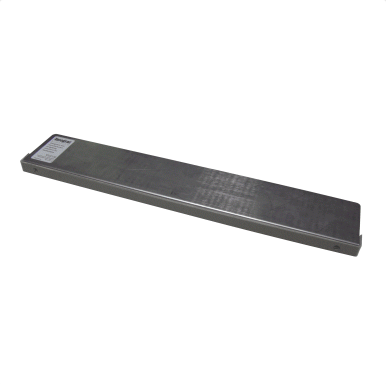
Wall Lights
| Caulk Gun
| Black Electrical Tape
|
Waterproof Connectors
| Rake
| Contractor Trash Bags
|
12-2 Low Voltage Wire
| Shovel
| Extension Cord
|
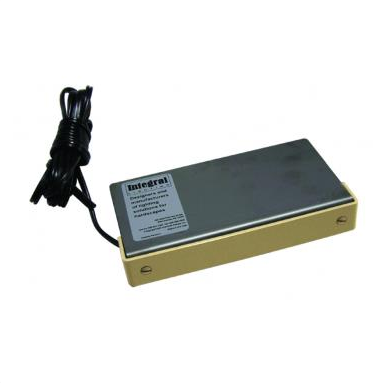
60-Watt Transformer*
| Wire Cutters
| Laundry Basket
|
Path Lights**
| Layout Sketch
| |
Integrator***
| Masonry Hammer
| |
Paper and Pencils
| ||
Rubber Tipped Gloves
| ||
SRW Adhesive Glue
|
* When installing more lights, a 300-watt transformer might be required. ** You can add path, accent, and up-lights to your layout, too. *** Install an integrator (a stainless steel sleeve) beforehand, when using a wet mortar bed.
Premium Transformers
Click thumbnail to view full-size


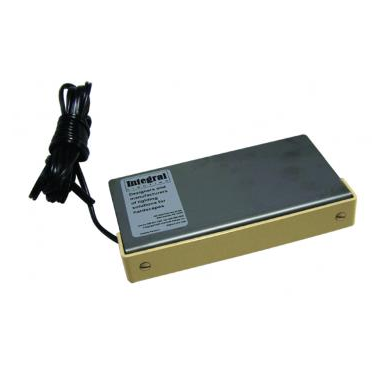
Transformer
Before you proceed, plan where you’re going to position the transformer for the lights. We recommend placing it inside, in your basement or garage. However, the beauty of low voltage wiring is that it can be pulled into the house wherever it's convenient for you.
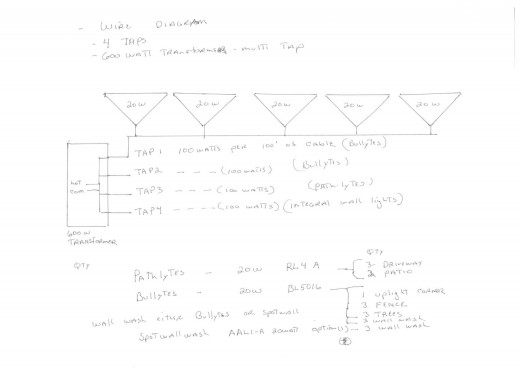
Transformers reduce standard household voltage at an approximate ratio of 10 to 1. Thus, a transformer will reduce a 120 voltage household current to 12.0 volts. We used a 60-watt transformer for our hardscape lighting project.
Regardless of voltage reduction, transformers are not voltage regulators. They deliver a constant 12 volts, for instance, and do not restrict electricity. Voltage dissipates according to distance, depending on the length of wire extended to lighting devices. A multitap magnetic transformer with its multiple leads is useful for voltage control and might be required for long distance placement of lights. Recall that a voltmeter checks the electrical output from your transformer to each lamp.
In the United States the most popular household electrical current is AC 120 volts. Most landscape lighting power packs are AC, because they use magnetic transformers to lower the voltage. Read more about AC under the "Installation Trouble Shooting" section (see below). Please heed the fact that AC-powered components are not compatible with DC.
The appropriate transformer will be necessary.
Then the fun begins! You can mix and match to integrate path up, down, and spotlight effects to your layout. These lighting atmospherics will dramatically elevate the overall visuals of your outdoor living spaces.
60 Watt Low Voltage Transformer Components

Lighting Layouts
Click thumbnail to view full-size


Plan Layout
Planning your outdoor lighting can be enjoyable and is worth the effort. You'll reap the rewards and it makes the eventual, actual labor stage a breeze.
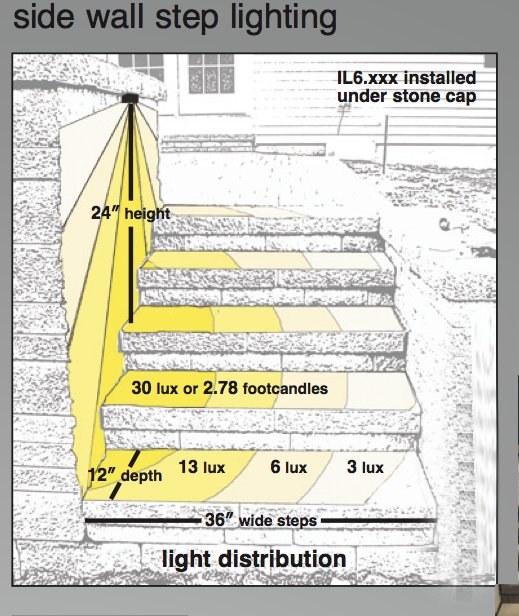
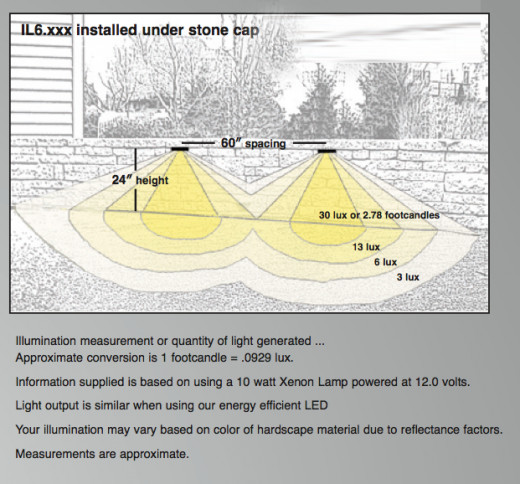
The pictures (to your right) show how the lights will appear. When lights are placed 60 inches apart, they generate a beautiful, overlapping glow. The two diagrams explain how lux (luminous flux - the measurement of brightness) will dissipate as it distances from the light source. The third picture (sorry, it's faint) is a hand sketch that my father made. Drawing each light and jotting down its total wattage will help you calculate the size of transformer required.
Be thorough in your design planning. It's easier to make corrections by erasing your pencil marks than by moving your wall lamps.
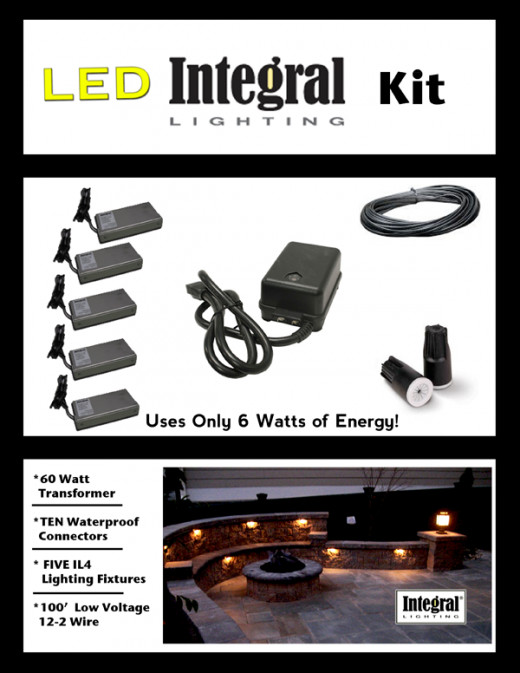
Il4 Led Kit
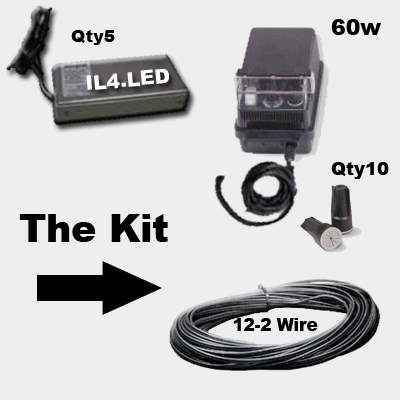
Integral Lighting Kit
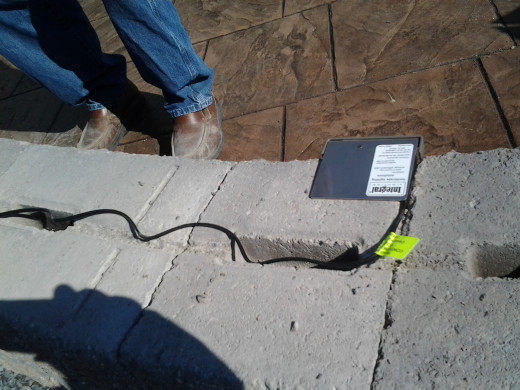
The Integral Lighting Kit contains 5 wall lights, 10 waterproof connectors, 100 feet of 12-2 wire, and a 60-watt transformer. The picture of the fire pit (located at the top of this article, under "Before You Install, Wire Your Wall" section) displays an Integral Lighting Kit installation. For the project with my dad we used one kit and added an extra light for a total of 6.
Please remember that you can add on, to further lighten your layout, but it can't exceed the wattage capacity of your current transformer. If it does, you simply need to upgrade the transformer to a larger size or add another one.
Integral Lighting Kit Product Shot

Integral Lighting Kit
12-2 Low Voltage Wire
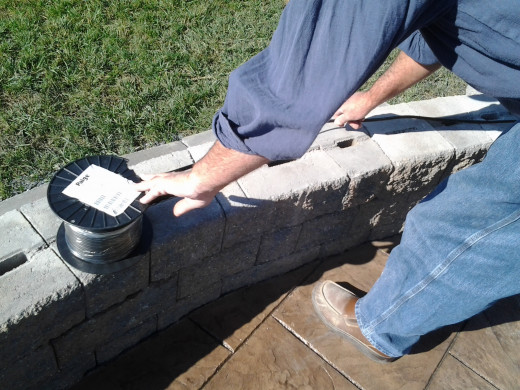
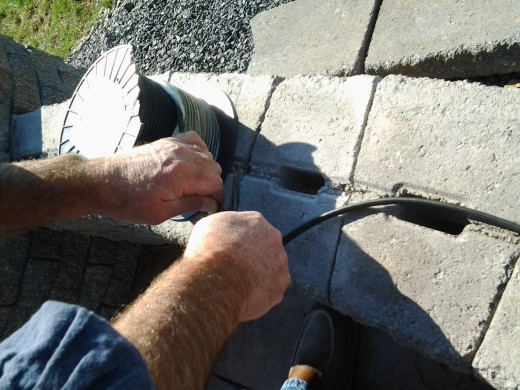
Once you’ve secured the transformer, plan a route for the wires. The best place to pull them into the house is probably at the top of a basement window. Just drill a small hole, feed the wire through, and add caulk. Next, unroll your wire. A tip is that we used a screwdriver as a spindle so the wire was easy to unroll. You can see in the pictures below how it’s done.
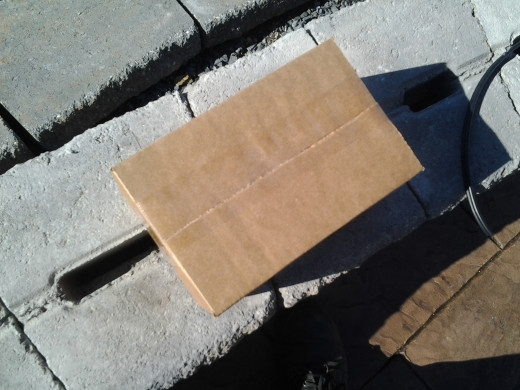
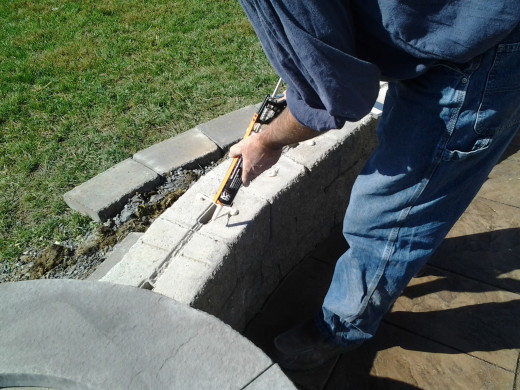
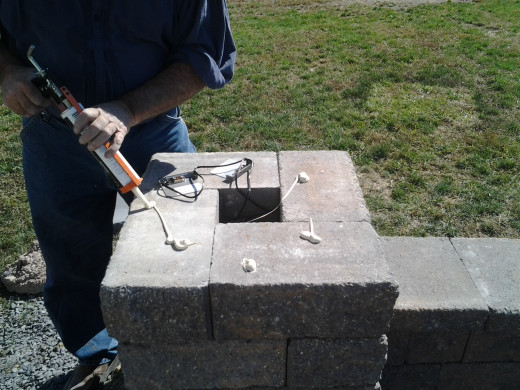
In addition, we made sure the top stone of the wall was not permanently secured when installed. If your stone is already adhered, you will have to break the top layer of stone with a chiseling tool in order to install the lights.
As a general rule, when you run a cable from the transformer to the last fixture, if the run is within 100 feet, use a minimum size wire of 12-2 gauge.
If your installation will merely require a few fixtures and involve a short cable run, first run the wire to the farthest lamp. Ideally there should be a minimum of 25 feet of cable. Remember that increasing the cable run decreases the output.


Cross View of Wall

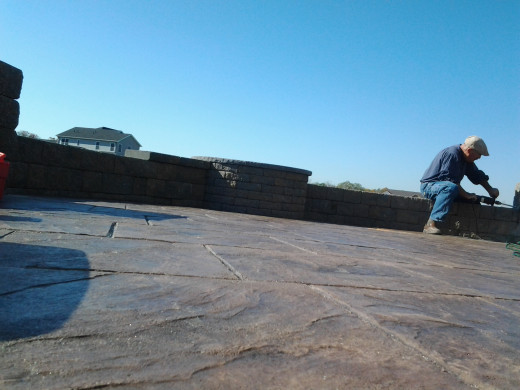
Fire Pit Patio Installation
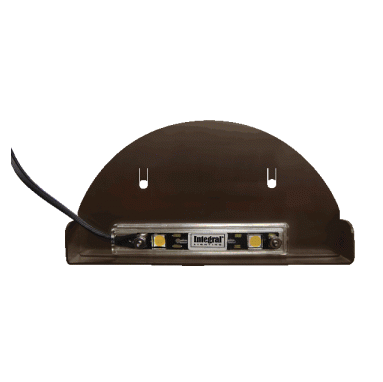
You can quickly browse through the above images to get the gist of the project that my father and I performed. Caps were left unglued for the ease of installing lights, then afterward glued in place. If this step is not possible, Integral Lighting has a retrofit lamp available for already existing installations.
Wiring the Retaining Wall

Gluing the Caps

Caps
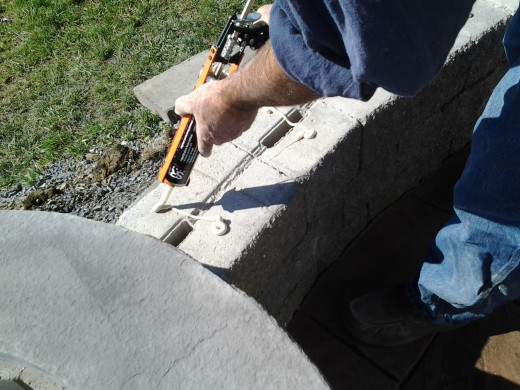
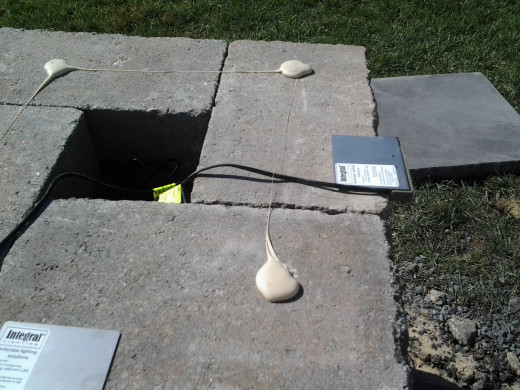
We fed the wire through the hollow center part of the end column. Take off the unglued caps. Make sure you keep them organized by placing them along the electrical line, so you know where to put them back when you’re finished wiring. We ran the wire along the top row of our sitting wall. Once our wire was installed, we measured approximately three feet in-between lights, and positioned the wall lights.
Preparing the Columns

Splicing Wire
Measure twice, cut once! Always match the markings on the individual cables. Be very careful when splicing the wire. This part of the job can seem simple, yet people get impatient and tend to want to cut quickly. I have seen over and over again wires cut too short. As a result unnecessary time and labor are incurred. It is just downright aggravating to have to go back and wire the entire wall again. Follow the markings on the wire and be consistent.
Connectors

Digging a Trench
Continuing, we connected each line to the transformer and did a few tests with the voltmeter to make sure the lights were working. Next, we wired it to the main feed we fed through our end column. We took our shovel and buried the wire in a shallow trench approximately six (6) inches deep.
Once all the wire was buried, and we were sure the lights were working, we got our masonry glue and secured the cap stones on top of the lights. The homeowner had his electrician install a switch and mount the transformer in his basement. (This optional step greatly improves the operation of any lighting system. You can simply turn on and off the lights from inside your house whenever you like.)
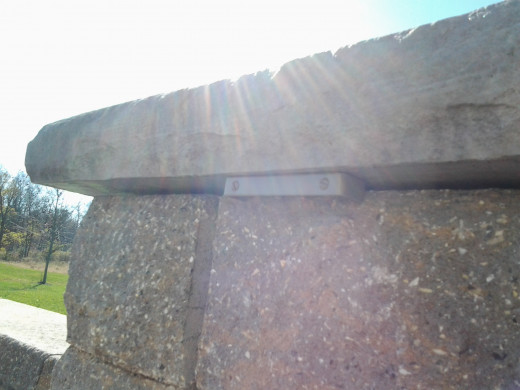
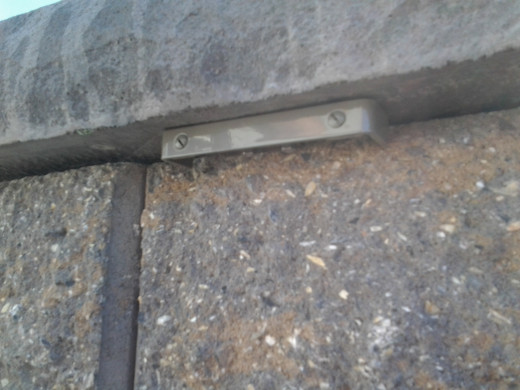
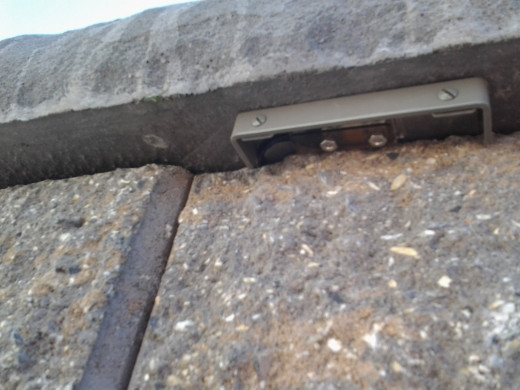
Lights on the Column

IL4 LED Model

Lighting Samples
Click thumbnail to view full-size


Wall Light Sizes
Click thumbnail to view full-size


Purchase Guide
Various wall lights are available. Lights are sized for different applications. Even though the 4-inch LED wall light is used most often, the 6-inch LED has more overall light output. The 18-inch wall lights are great for larger steps, large columns, and more industrial needs.
Retaining wall lights can also be mixed and matched. Remember the system can always be enhanced if more lights are needed down the road.
Colors
Click thumbnail to view full-size


Integral Lighting Store
Color Temperatures

LED Information
Kelvin scale (see above) measures light sources (by degree K) to describe color temperatures (e.g., warmth or coolness). The lower the K, the warmer; whereas the higher the K, the cooler and more bluish.
Many think all LED lights have a cool hue. However, the appropriate view of lighting for the appropriate application is available. Some examples are soft lighting (warm incandescent 2700K) for effect, brighter (neutral 3000K) for functional purposes (such as walking), and daylight (4200K) for greater illumination.
The IL LED 12v AC fixture is designed to operate with a magnetic transformer. For optimum performance in both light output and life, we suggest voltage not exceed 11.5 volts for the first fixture. The output of the LED module is equivalent to that of a 10-watt bulb, with a 3000K color rendering index, and energy consumption of approximately 2.4 watts. Hopefully, an ultimate savings of energy (and pocketbook) expenditure.
Important: Upon installation always confirm voltage with a voltmeter to ensure that the proper voltage of electricity is present in the first lamp. The appropriate operating range is between 11.0 to 12.0 volts.
Color Temperature Example

Integral Lighting Deck Lights

Installation Trouble Shooting
Issues arise. Here's a refresher about voltage variations and more:
- Input voltage to transformer. Primary voltage in homes today ranges from 115 to 125 volts, a variance of 8 to 10%. That's why a voltmeter is a handy tool.
- Total wattage required = Wattage per lamp x number of lamps. That's how you calculate the size of the transformer that's needed.
- Amount of load to transformer. As the load increases, voltage drop increases. When one fixture burns out, voltage increases.
- Length of wire or run. As the run of wire from transformer to last fixture becomes longer, voltage drop increases.
- Bulbs burn out. When one fixture burns out, voltage increases. The result is higher voltage affecting the remaining lamps.
- What does 12-2 electrical cable stand for? The 12 represents gauge; the 2 means that two (2) wires are in the cable.
- Gauge of wire used. The lower the gauge of wire, the less resistance. Even though smaller cable can be used for shorter runs, the optimal cable is direct burial 12-2.
- AC (or alternating current) is the U.S. standard. DC stands for direct current.
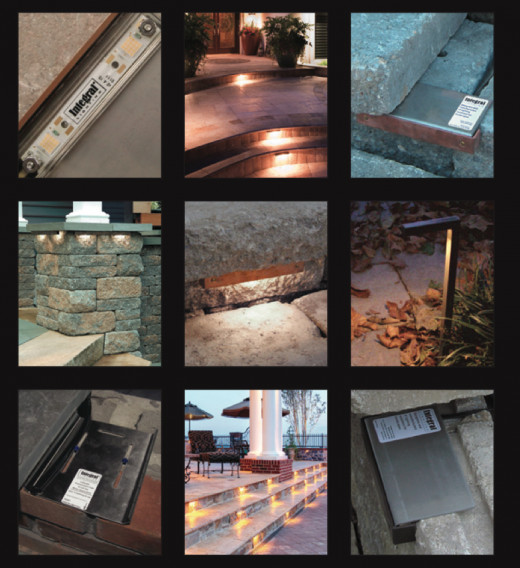
Collage Of Wall Lights